Disclaimer: I’m sharing this from my own personal experience. What works for me and my budget may differ from yours. Always do your own research before making any purchase or starting a new workout routine.
One of the best things about living in the age we do is that you can shop from almost anywhere in the world. As long as a seller ships internationally, the options are practically endless. I started building my home gym by shopping across different online platforms, comparing prices between local and overseas stores to make sure I was getting the best value for each item.
My approach was simple: for bulky or heavy items, I would first check if overseas platforms could deliver them. If the item was too large or heavy to ship internationally, I would fall back on my local online stores. This way, I could be confident I was not overpaying for anything.
Before we get into what I bought, there is one tip I want to share with anyone who shops online for gym equipment.
Always Record Your Unboxing
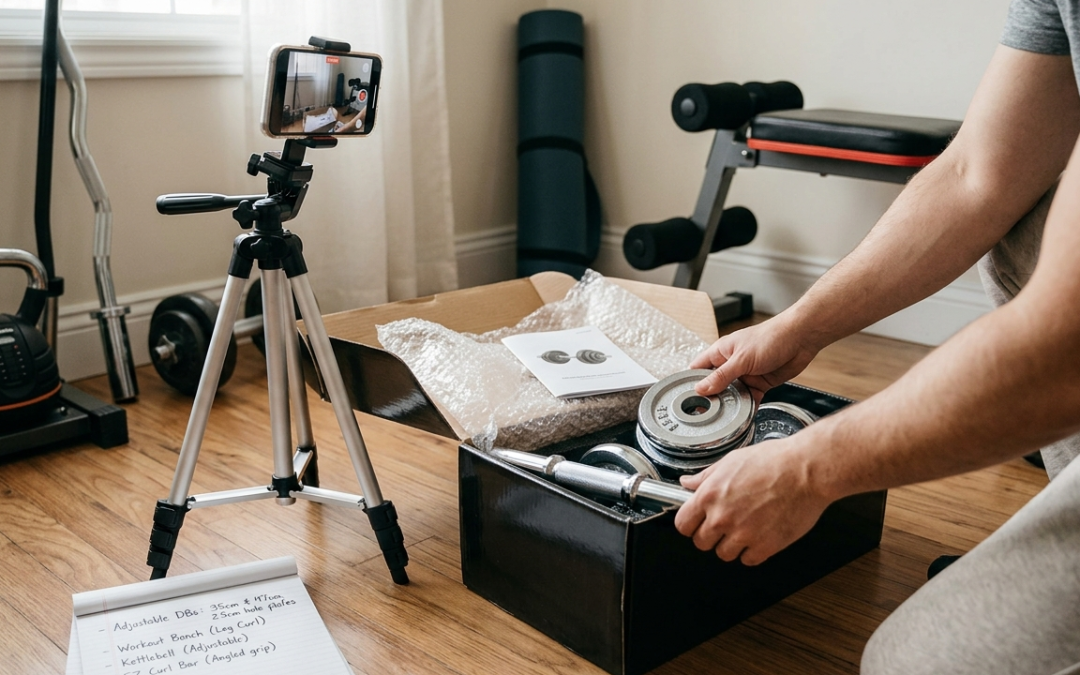
Buying online carries a risk that most people only think about after something goes wrong. Items can arrive damaged, dented, or looking nothing like the product images. The best thing you can do to protect yourself is to record a video from the moment you open the package to the moment you have fully unpacked everything.
This video becomes your proof if you need to make a damage or dispute claim. If you are unboxing alone, a simple tripod to hold your phone is a worthwhile investment. You might even enjoy the process enough to start sharing your setups online. Who knows, your home gym journey might be the start of something bigger.
What I Got and Why
I always aim to keep things simple and practical. When choosing equipment, I look for items that offer multiple uses rather than ones that serve only a single purpose. Here is my list, in the order I got them.
Adjustable Dumbbells
The dumbbell is the foundation of any home gym and the first item I bought. There are many types to choose from, varying in material, fixed or adjustable weight, handle length, and plate hole size. I went with adjustable dumbbells and bought two different handle lengths: 35cm and 47cm. The shorter handle is useful for exercises where a longer bar would knock against my body, while the longer one suits heavier compound movements.
For the weight plates, I chose a bundle that matched where I was at the time, knowing I could always buy more plates as I progressed. One important thing to check before purchasing is the hole size of the plates. Plates come in 2.5cm and 5cm hole diameters, and the plates must match the diameter of the handle bar, so make sure both are compatible before you buy.
Adjustable Workout Bench
This took me the longest to decide on. My main choice was between a bench with a pulley attachment and a bench with a leg curl feature. I went with the leg curl bench, and looking back, I feel the pulley bench might have suited my needs better due to the wider range of exercises it enables. That said, there is genuinely no right or wrong answer here. It entirely depends on your workout habits and personal preference. I mention this so you can think about your own routine before committing.
Adjustable Kettlebell
Since I already had a collection of weight plates from my dumbbells, getting an adjustable kettlebell was a natural next step. It uses the same plates, which keeps costs down and storage simple.
EZ Curl Bar
The EZ curl bar is one of the most versatile pieces of equipment I own. Its curved design allows for multiple grip positions and works well for a wide range of exercises, particularly bicep and tricep movements.
What I personally enjoy about the EZ curl bar is how it feels on my wrists and arms. According to a peer-reviewed study published in PMC, the EZ bar’s angled grip places the wrists in a more neutral position compared to a straight barbell, which reduces strain on the elbows and wrists during curling movements. I also find it comfortable to use in a front squat variation, where the curve of the bar allows me to hold it more naturally. This is purely a personal preference, and I would encourage you to experiment and find what feels right for your body.
You Do Not Need All of This to Get Started
I did not buy any of this all at once, and you certainly do not need to either. If you are just starting out, here are some genuinely effective ways to begin with little to no investment:
- Start with bodyweight exercises, no equipment required at all
- Use a sturdy household chair for seated exercises like overhead presses or tricep dips
- Fill water bottles or a backpack with books to create makeshift resistance
- Once bodyweight movements become easy, such as when you can comfortably complete more than 50 reps across 4 sets, that is a good signal that it is time to start investing in equipment
The Real Benefit of a Home Gym
Beyond the cost savings, the biggest advantage of training at home is the privacy. You can train at any hour, wear whatever you like, take as long as you need between sets, and experiment freely without feeling self-conscious.
The right home gym setup is not about having the most impressive or expensive equipment. It is about having what suits your goals, fits your space, and keeps you showing up consistently. Always research before committing to any purchase, and remember that every body is different. The best setup is the one that works for you and that you will actually use.
My goal with this blog is to share my own progress honestly, including the purchases I would change and the ones I stand by. If you found this helpful, please share it with someone who might be thinking about building their own setup at home.